Leave Your Message

How to Choose the Best Outdoor Play Slide in 2026

Choosing the best Outdoor Play Slide in 2026 means looking beyond bright colors and bold product claims. A slide must fit the child, the yard, and the family’s willingness to check it over time. The U.S. Consumer Product Safety Commission (CPSC) has reported that more than 200,000 children visit emergency rooms each year for injuries associated with playground equipment. This is a broad, older annual estimate, not a slide-specific risk prediction. Still, it is a useful reminder: design and installation matter. Not just looks.

For practical guidance, the CPSC’s Public Playground Safety Handbook explains how equipment layout, fall zones, and protective surfacing affect safety. ASTM International’s F1487 standard sets safety requirements for public playground equipment; home-use products may follow different standards. These references help frame the decision, but they cannot guarantee that a particular slide suits every garden or child. I would not treat a glossy product page as proof of durability. That deserves a second look.

Before comparing models, measure the available space, including the area at the bottom where a child lands. Check the slide’s recommended age range, platform height, weight limit, anchoring method, and surface requirements. A taller slide may feel more exciting, but it also needs more room and careful setup. Consider sun exposure, too: a dark plastic surface can become hot on a bright afternoon. Small details count. In this guide, we’ll compare materials, dimensions, safety features, and maintenance needs so families can choose with clearer expectations—not just a bigger promise.
How to Choose the Best Outdoor Play Slide in 2026

Identify the Age Group, Play Needs, and Intended Setting

Choose the Best Outdoor Play Slide in 2026: Identify the Age Group, Play Needs, and Intended Setting

Start with the child, not the slide’s height or color. The U.S. Consumer Product Safety Commission’s Public Playground Safety Handbook (2015) groups play equipment for ages 6–23 months, 2–5 years, and 5–12 years. These age bands matter: a preschooler may need a short, gentle slope and easy access, while older children often want more speed and a longer runout. Check the manufacturer’s age and weight guidance, too. I still find age alone easy to misjudge; confidence and coordination vary widely.

Consider what play looks like where the slide will stand. In a small backyard, measure the full footprint, including the space at the bottom where children land and move away. For a shared play area, consider how several children will queue, climb, and take turns. CPSC guidance emphasizes age-appropriate equipment and protective surfacing; grass may look soft, but it does not reliably cushion falls. Match the surface and installation to the site, and inspect for loose fasteners, sharp edges, and standing water.

Tips: Measure twice. Watch children play before choosing. Note whether they climb steadily, need help, or rush down before the landing area clears. That detail can change the right choice. Cite: CPSC, Public Playground Safety Handbook, 2015.


Compare Slide Types, Materials, and Key Features

Choosing an outdoor play slide starts with the available space and the children who will use it. Straight slides suit narrow yards and are easier to supervise. Wavy slides add a little variety, while spiral designs need more room and careful placement. Measure the full play area, including the exit zone. A slide that fits on paper may feel cramped once children are running around it.

Compare materials as well as shape. Plastic slides are generally lightweight and resist rust, but prolonged sun can make surfaces hot or fade their color. Metal slides are sturdy, yet they may heat quickly in direct sunlight. Check for smooth edges, secure connections, a stable ladder, and handholds that small hands can grip. Small yards benefit from simple layouts. There is no perfect material; shade and upkeep matter, too.

Tips: Visit the play area at midday and check the slide’s surface temperature before use. Look for the manufacturer’s age and height guidance, and follow its installation instructions. Keep the landing area clear of paving stones, toys, and exposed roots. Check it closely. A quick inspection can reveal loose bolts or cracks, though it cannot replace regular maintenance.

Outdoor Play Slide Materials: Typical Thermal Conductivity

Thermal conductivity indicates how readily a material transfers heat. Lower values mean slower heat transfer through the material; they do not predict the slide’s actual surface temperature.

Approximate room-temperature values in watts per meter-kelvin (W/m·K). Values vary by grade, formulation, and temperature. Surface temperature also depends on sunlight, color, airflow, and exposure time.

Check Safety Standards, Stability, and Fall Zones

Choosing an outdoor play slide in 2026 means looking beyond its color and height. Check the product label for relevant safety standards, age guidance, and weight limits. These details help match the slide to your child and your yard. Read the installation instructions before buying; a slide that cannot be secured as directed may not suit your ground.

Stability matters during everyday play. Place the slide on firm, level ground, then check that its base sits flat and its connections stay tight. Give it a gentle push from the side. Any rocking deserves attention, even if the slide looks sturdy. I have seen how easy it is to overlook uneven ground when focusing on the play area itself. That small oversight can change how securely equipment sits.

Tips: Keep the fall zone clear of fences, trees, paving, and toys. Use impact-absorbing surfacing suited to the slide’s height, and follow the maker’s guidance for its coverage and depth. Check the area after rain; loose mulch can shift, and bare patches may appear. Recheck fasteners and the landing space regularly. Not every yard makes this easy. If space is limited, measure carefully before setting the slide up.

Measure the Site and Review Installation Requirements

Before choosing a slide, measure the full play area, not just the equipment’s footprint. Include the ladder approach, slide runout, and room for a caregiver to stand. Check overhead branches, fences, doors, and changes in ground level. A tidy sketch can still miss a low branch. Small detail. Worth checking.

The U.S. Consumer Product Safety Commission’s Public Playground Safety Handbook recommends a minimum 6-foot use zone around most stationary public-playground equipment. A slide’s exit area may need additional space, so follow the product’s installation manual rather than treating 6 feet as a universal rule. Note the site’s slope and drainage, too: a level-looking lawn can hide a soft, muddy patch after rain. Confirm the required anchors, surface, and access for tools before ordering.

Tips: Mark the slide footprint and clearance with string or chalk, then walk the route carrying a tape measure. Check buried utilities before digging, and verify that the ground can support the specified anchors. If the manual’s dimensions do not fit, pause and reassess; squeezing the layout is not a useful shortcut.

How to Choose the Best Outdoor Play Slide in 2026 - Measure the Site and Review Installation Requirements

Slide Configuration Typical Intended Age Illustrative Equipment Footprint Site Measurement Checks Installation Requirements to Review
Low, straight slide attached to a small play structure Often designed for preschool-age children; confirm the age range stated for the specific equipment. Example planning range: about 6–10 ft long by 4–7 ft wide for the structure and slide, excluding the surrounding use area. Measure the structure’s full length and width, then check the slide exit path for fences, trees, walls, and walkways. Confirm the required platform height, anchoring method, and manufacturer-specified use zone. Check that the slide exit is unobstructed and that the landing surface is suitable for the equipment’s fall height.
Medium straight slide on a raised play tower Commonly available for school-age children; suitability depends on the specific design and stated age range. Example planning range: about 10–16 ft long by 5–9 ft wide, excluding the use area. Measure from the back of the tower to the end of the slide, and include space for access, circulation, and the slide exit. Verify platform and slide dimensions together. Check required footings or anchors, underground utility locations, drainage, and the prescribed protective surfacing depth for the equipment’s fall height.
Spiral or curved slide on a play tower Age range varies by slide height, layout, and manufacturer specifications. Example planning range: about 8–14 ft long by 7–11 ft wide; the curved path may require more lateral space than a straight slide. Mark the complete curve and exit direction on a site plan. Check nearby equipment, posts, branches, and property boundaries. Review the installation drawings for the slide’s orientation, platform connection, support points, and clearance requirements. Confirm that the installation surface and foundations match the specified design.
Double-lane slide Often selected for shared play; confirm the intended age range and capacity information for the specific model. Example planning range: about 10–16 ft long by 8–13 ft wide, excluding the use area. Allow for the full width of both lanes, safe access to the platform, and clear space beyond both slide exits. Check the manufacturer’s platform, support, anchoring, and use-zone drawings. Plan the surfacing across the full fall area, not only under the slide structure.
Ground-level or low-height slide May be designed for younger children; use only within the age and supervision guidance provided for the equipment. Example planning range: about 5–9 ft long by 3–6 ft wide, excluding the use area. Check the full slide length, access route, and exit area. Ensure the layout does not create a trip hazard or block a gate or path. Confirm the required base preparation, anchoring, and surface material. Even low equipment needs installation and clearance checks according to its instructions and applicable local requirements.
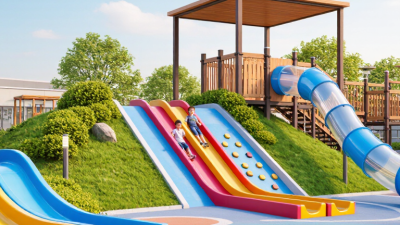
Embankment slide installed on a slope Varies by slide design and site conditions; follow the equipment’s stated age range. Example planning range: about 10–18 ft long by 4–8 ft wide, with additional room needed for the slope and exit area. Measure the slope length, width, and gradient. Check soil stability, drainage, erosion risk, and the route for reaching the slide entrance. Confirm that the slide is approved for embankment installation. Review site grading, foundations or restraints, drainage, and the required surfacing and use zone with the installation instructions and a qualified installer.

The footprint ranges above are illustrative planning estimates, not product specifications or required clearances. Before purchase, measure the available site and compare it with the selected equipment’s installation drawings. Use-zone dimensions, surfacing type and depth, anchoring, and fall-height requirements vary by equipment and applicable local standards; confirm them with the manufacturer and local authorities.

Compare Costs, Durability, and Ongoing Maintenance

An outdoor slide’s purchase price is only part of its cost. Compare the complete setup, including delivery, assembly, surfacing, and any needed ground preparation. A lower-priced model may need extra work if the yard slopes or has poor drainage. Prices also vary by size and material, so compare similar designs rather than headline figures alone. Budget for occasional replacement parts, too. Small costs add up.

Durability depends on more than whether a slide feels sturdy on day one. Sun exposure can fade or weaken some plastics, while damp conditions may affect metal components and fasteners. Check the product’s care instructions and inspect joints, steps, and handholds regularly. Look for cracks, sharp edges, loose bolts, and standing water after rain. It takes minutes. Keeping the area clear of grit can also reduce wear and make the surface less slippery. For a wooden structure, expect periodic sealing; for other materials, mild cleaning may be enough. Maintenance needs differ by climate and use, so a schedule from another family may not fit your yard. I’d be careful about treating “low maintenance” as “no maintenance.” That assumption is easy to make.